
One of our pre-Thanksgiving week traditions is turkey-shaped sandwiches in our lunches and they are super easy to make!
Unlike many cute lunches, these sandwiches only require items you likely already have in your kitchen--a good sharp knife is key. The only potential shopping life item is sugar eyes and, since you can use those on so many cute food ideas, they are worth buying a package.

First, make your sandwich. Use softer, fresh bread, and keep the fillings simple. It will help you when you start cutting. A cutting board is a better choice than the counter because you'll need to cut all the layers.

At the bottom of the bread, make a vertical cut about an inch and a half tall.

Leave a gap and make a second similar vertical cut. This will be the "neck".

Using your knife, make a circular shape for the turkey's head. It works best if your knife is pointed straight down. Don't worry about perfection, mine never look the same twice. Ideally, you're going for a peg person or mushroom shape.

Separate the head and neck from the rest of the sandwich and cut those pieces into one inch square chunks for feathers.

I usually get about seven pieces for the feathers. You can make more or less, but after trying a few varieties, this looks the best to us.

Once your turkey is cut, you'll just need to make a few decorative choices.

For the face, you'll need a piece of cheese to cut a small corner off for the beak.
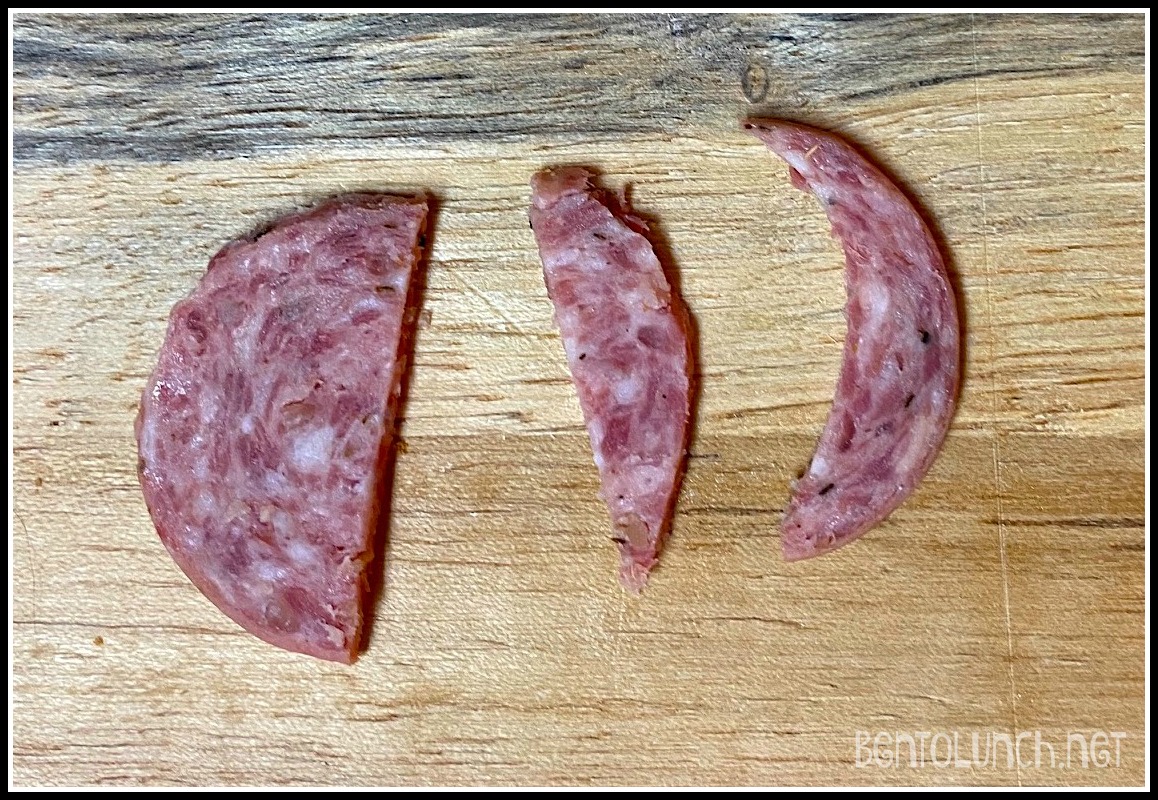
Cut a small wavy piece from pepperoni or sausage for the waddle too.

Use dots of cream cheese to stick down the beak, waddle, and sugar eyes.

Reassemble your sandwich in your lunchbox and add your sides.
It's minimal work and sure to make your kids smile!
Unlike many cute lunches, these sandwiches only require items you likely already have in your kitchen--a good sharp knife is key. The only potential shopping life item is sugar eyes and, since you can use those on so many cute food ideas, they are worth buying a package.
First, make your sandwich. Use softer, fresh bread, and keep the fillings simple. It will help you when you start cutting. A cutting board is a better choice than the counter because you'll need to cut all the layers.
At the bottom of the bread, make a vertical cut about an inch and a half tall.
Leave a gap and make a second similar vertical cut. This will be the "neck".
Using your knife, make a circular shape for the turkey's head. It works best if your knife is pointed straight down. Don't worry about perfection, mine never look the same twice. Ideally, you're going for a peg person or mushroom shape.
Separate the head and neck from the rest of the sandwich and cut those pieces into one inch square chunks for feathers.
I usually get about seven pieces for the feathers. You can make more or less, but after trying a few varieties, this looks the best to us.
Once your turkey is cut, you'll just need to make a few decorative choices.
For the face, you'll need a piece of cheese to cut a small corner off for the beak.
Cut a small wavy piece from pepperoni or sausage for the waddle too.
Use dots of cream cheese to stick down the beak, waddle, and sugar eyes.
Reassemble your sandwich in your lunchbox and add your sides.
It's minimal work and sure to make your kids smile!
Comments
Post a Comment